|
ZiBaT => Peter
Levinsky => Tech => Note |
A .Net Core Rest Service |
Updated : 2018-09-19
|
To understand how You can design and implement a Rest Service using Visual Studio with C# .Net Core.
A note describing the communication aspect of a Rest Service NetHttpNote.pdf from Peter Levinsky
Best practice in designing URL etc for RESTful Service Best Practices from Oswago Universitet
A Rest Service (short for REpresentational State Transfer) is a service, which gives you (the client) a uniform access to resources.
A Rest
Service is independent of the IT-platform (i.e. operating system) and of the programming language (e.g. C#, Java, Python).
The Rest Service is Stateless, which means each request must have all information needed to carry it out
and send a response back,
therefore the server cannot remember states from one request to another.
The Rest Service make use of the underlying HTTP protocol to provide all information for the request. The HTTP methods (GET, PUT, POST, DELETE and some more for advanced use) are used as verbs indicating the intension (Read, Update, Create, Delete) of the resources. The HTTP URI are used to specify which resources the request is concerning. The HTTP body for transporting data (normally as JSON encoded). The HTTP status code for reporting to the client the successfulness of a request and Some HTTP header fields for some more advanced features regarding a Rest request and response.
In Visual Studio and C# you can provide a Rest Service by different project (WCF, .Net Framework, .Net Core etc.).
This note guides you through a .Net Core web service project in 4 steps:
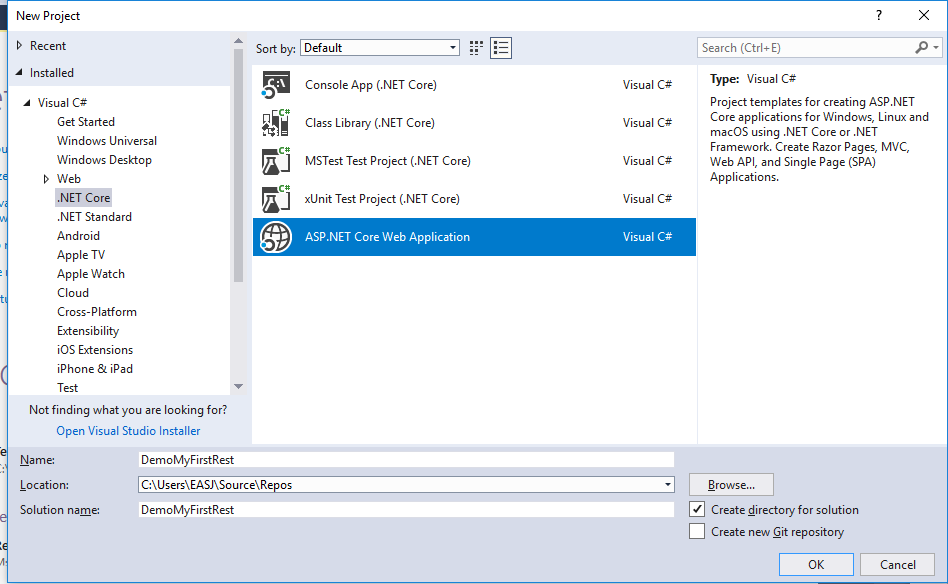
In Visual Studio 2017 create a new project - Choose .Net Core and pick the ASP.NET Core Web Application (in example named DemoMyFirstRest).
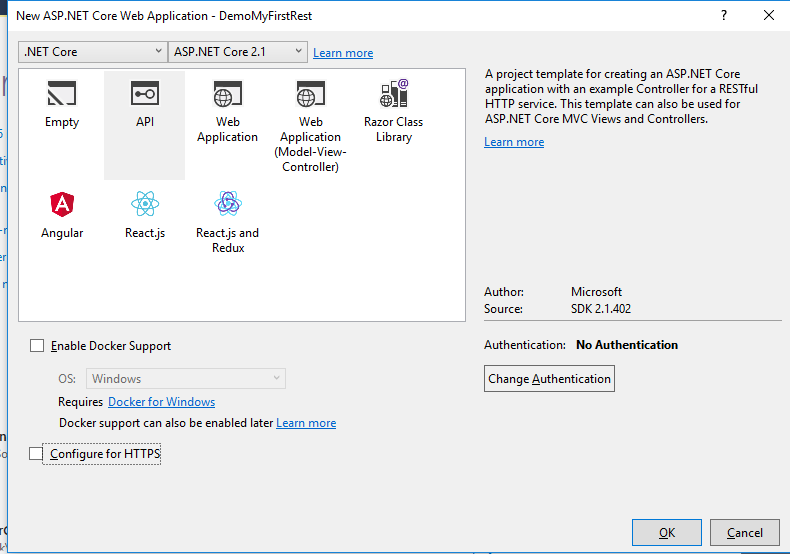
The pick the type of project - in this example you pick the straight API solution, without Docker enabling nor configure for HTTPs (for real world use HTTPs, but in this demo use the simpler HTTP)
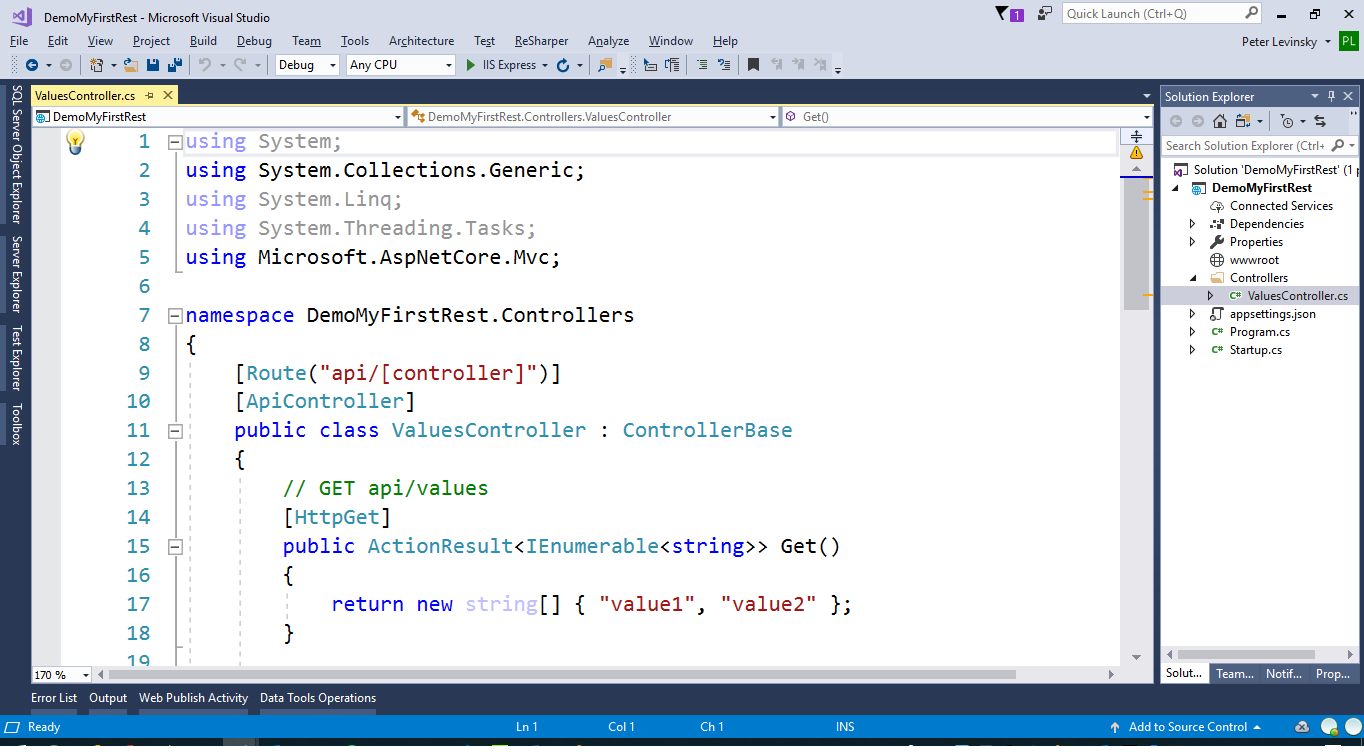
You will now have a bare solution, with a TestController 'ValuesController', so you are now able to just start your Rest Service.
This will compile your program, deploy it to the built in WebServer and start it there, finally it will start your default browser and send a Get all Rest request.
Your application would look like:
 .
.
In the solution of your newly created project you have several files.
For each new Resource you would like to provide, you have to decide the name of this resource e.g. Hotels.
Then you are to
create new controller in the Controller folder. Right-click add-> controller and pick ‘Web API Controller with read/write actions’:
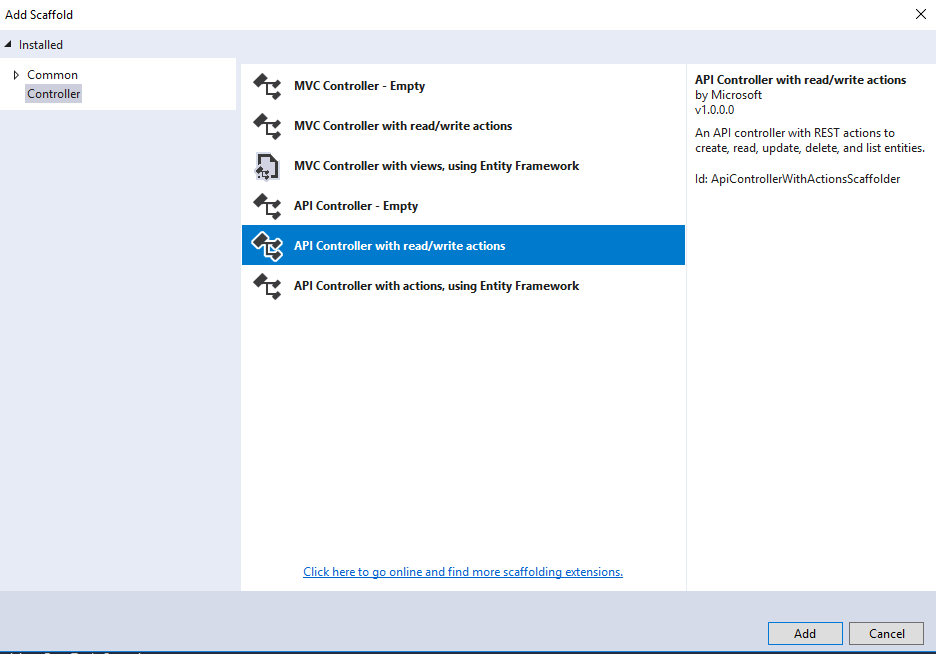
Give your controller the name you have decided in this example DemosController.
This template give you an example of an Rest Service where you can Get, Get a specific id, Put, Post and Delete.
You will thereby be able directly run your Rest Service and access {localhost:somePortNumber}/api/Demos
Once again we will look at the ValuesController to better understand the Controller:
.
Simple URIs
To address the resource we use the URI in the HTTP protocol. In the Controller we can decide our URI.
This we configure using the Route Annotation as we can see at line 9 : [Route("api/[controller]")]
In this case the routing is set up to use the generic form api/[controller] i.e. instead of [controller] the name of this controller is substituted meaning the URI is {IPAddress:Port}/api/Values because the controller is named ValuesController.
You can also describe your own uri by changing line 9 to e.g. [Route("myApi/SomeName)] - not a good name only for illustrating the point. This would give the URI {IPAddress:Port}/myApi/SomeName.
If you need to have some specific URI to example Get Domes with a specific id, you can add the annotation [Route("{id}")]below your [HttpGet] annotation. If this is the case, your method must have a parameter with this name i.e. Get(int id) or Get(string id).
Complex URIs
You can even have more complex URIs like [Route("{id}/additionals/{"secondId")]which have the URI like{IPAddress:Port}/myApi/SomeName/4/additionals/67, which means get the SomeName resource id = 4 and find the resource additional number 67.
A better example could be get all bookings from Hotels where id = 7 Route=[Route("myApi/Hotels/{hotelid}/Bookings")] example {IPAddress:Port}/myApi/Hotels/7/Bookings
URIs with filters (i.e. having a '?')
If you have some filters included in your URL e.g. like {IPAddress:Port}/myApi/Hotels/7/Bookings?Customer="Peter", to find bookings at the number 7 Hotel where the guest/customer has a name Peter.
The route would still be [Route("myApi/Hotels/{hotelid}/Bookings")] but in the parameter list to the method it would look like:
public IList<Booking> Get(int
hotelid, [FromQuery] HotelSearchData query) where the type HotelSearchData is a simple model class with properties.
In this case one of the properties must be 'Customer'.
To describe the action to take place (Read, Update, Create or Delete) the annotation [HttpGet, HttpPut, HttpPost or HttpDelete] are used, see the example line 14. By these different annotation your route the different Http request to different methods even if they have the same URI i.e. they are to differentiate GET {IPAddress:Port}/api/Values from POST {IPAddress:Port}/api/Values, the two URIs are the same but differ by their methods, so the first will get all values of the resource while the second will create a new instance of the resource at the server site (if allowed).
If you would like to get the value of a specific id you could do:
[HttpGet]
[Route("{id}")]
or you could make a shortCut like
[HttpGet ("{id}")]
When transporting data we have two situations; One when response a request where data is sent back the Other is when a request contains data for fulfil the request i.e. when creating new instances (POST) or modify (PUT) existing instances of resources.
The First situation is easy, because the .Net Core platform by itself encode your result in JSON and send it back in the HTTP body with the response.
In the second situation you must indicate what you expect is in the body. An example:
[HttpPost]
public void Post([FromBody] string value)
Note the [FromBody] annotation which indicate that this should be in the body of the Http request. In this case the data is of type string and here named value, but it could be any type e.g. Hotel value, then the data should be a Hotel object.
When you would like to send special information e.g. request a range of data. You can use the Http Header fields and to read these within your Rest Service you should read the request headers e.g. like:
String rangeValue = "";
if (Request.Headers.Keys.Contains("Content-Range"))
{
rangeValue = Request.Headers["Content-Range"][0];
}
If you on the other hand would like to send special information back with the response, you should do something like this:
Response.Headers.Add(new KeyValuePair<string, StringValues>("Demo","SomeValue"));